
19 Winter Hair Braid Ideas That’ll Make You Look Effortlessly Chic This Season
When winter rolls in and your hair starts acting like it’s in hibernation mode, braids become the ultimate rescue plan.
They’re stylish, practical, and surprisingly easy to pull off — even when your hair refuses to cooperate with the weather.
I’ve always loved how braids can instantly make a lazy hair day look like a polished one.
Whether you’re cozying up in a chunky sweater or heading out for a holiday dinner, these winter braid ideas will make you feel confident, warm, and undeniably chic.
1. Classic French Braid
The timeless French braid is every girl’s go-to winter style. It keeps your hair tucked neatly, protects it from cold wind damage, and still looks elegant.
How to do it:
- Brush your hair thoroughly.
- Start at the crown, dividing hair into three sections.
- Cross side sections over the middle while adding small strands as you go down.
- Secure with an elastic band.
Pro tip: Apply a small amount of leave-in conditioner before braiding to fight winter dryness.
Cost: Free if you do it yourself.
Pros: Protective, neat, suitable for all occasions.
Cons: Can cause tension if done too tightly.
2. Fishtail Braid
The fishtail braid gives that “effortlessly cool” look you see on influencers sipping lattes in oversized scarves.
Steps:
- Divide hair into two equal parts.
- Take a small piece from the outer side of one section and cross it to the opposite side.
- Repeat until you reach the end and secure it.
Tips: Use dry shampoo for added texture — fishtail braids look best when slightly messy.
Cost: $0–$5 (for a good dry shampoo).
Pros: Boho and chic.
Cons: Takes time if you have thick hair.
3. Dutch Braid
A Dutch braid is like the French braid’s bold sister — it stands out because it’s braided “under” instead of “over,” creating a 3D effect.
Steps:
- Part your hair into three sections.
- Cross each side strand under the middle one.
- Keep adding sections until you reach the end.
Tip: Pancake the braid (pull it gently) for a fuller, dramatic look.
Cost: Free.
Pros: Adds volume and definition.
Cons: Slightly tricky at first for beginners.
4. Side Braid
For casual winter brunches or movie nights, a side braid keeps things soft and romantic.
Steps:
- Sweep all hair to one side.
- Braid loosely — French, fishtail, or classic — and tie it off with a silk ribbon for a cozy touch.
Style Tip: Pull out small face-framing strands to soften the look.
Cost: Free or under $5 (if adding accessories).
Pros: Easy, romantic, suits any face shape.
Cons: Doesn’t hold well for fine hair without texturizer.
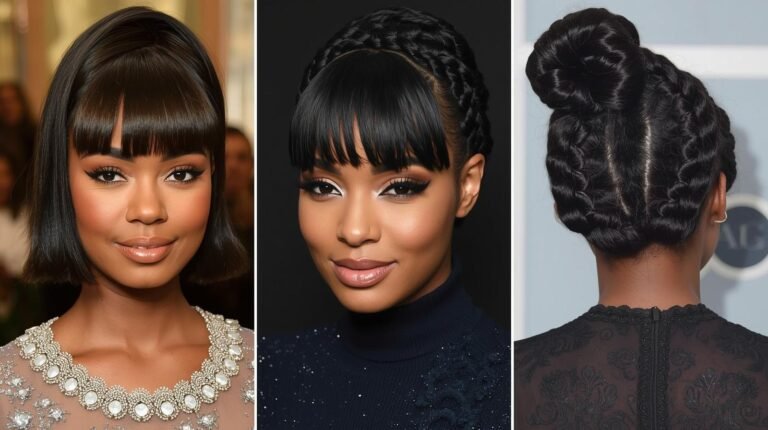
5. Crown Braid
Feel like a winter queen with a crown braid. It’s perfect for festive gatherings or cozy date nights.
Steps:
- Part hair down the middle.
- Braid each side (Dutch braid works best).
- Wrap both braids around your head like a halo and pin them securely.
Tip: Use bobby pins that match your hair color for a seamless finish.
Cost: Around $10 if you use styling pins and hairspray.
Pros: Regal, long-lasting, and keeps hair off your face.
Cons: Can feel heavy for thick hair.
6. Box Braids
Box braids are perfect if you want a low-maintenance yet protective winter style. They lock in moisture and look stunning with coats and beanies.
Steps: Have them installed by a stylist or learn at home with synthetic extensions.
Pro tip: Moisturize your scalp regularly with lightweight oil.
Cost: $100–$400 (depending on length).
Pros: Protective, lasts weeks.
Cons: Time-consuming installation.
7. Waterfall Braid
The waterfall braid looks like a cascading ribbon of elegance — dreamy, soft, and ideal for holiday dinners.
Steps:
- Start like a French braid at the front.
- Drop one section each time you cross over and pick a new strand from above.
- Continue around your head.
Tip: Curl the ends of your hair afterward for a fairytale finish.
Cost: Free to DIY.
Pros: Romantic and flowy.
Cons: Doesn’t stay tight for long.
8. Rope Twist Braid
For those mornings when you’re running late, a rope twist braid saves the day.
Steps:
- Divide hair into two equal parts.
- Twist both sections in the same direction, then wrap them around each other.
- Secure with a hair tie.
Cost: Free.
Pros: Fast, simple, and modern.
Cons: Can unravel quickly without hairspray.
9. Pull-Through Braid
If you want volume without the effort, the pull-through braid is your answer.
Steps:
- Create multiple ponytails down your back.
- Split and loop them through one another to create a braid illusion.
Tip: Add a small amount of serum for shine.
Cost: Free to $10 (for serum).
Pros: Full and voluminous.
Cons: Needs several elastics.
10. Bubble Braid
The bubble braid trend exploded on TikTok — and for good reason. It’s playful, quick, and surprisingly chic.
Steps:
- Tie your hair into a ponytail.
- Add elastics every few inches, then gently tug sections to form “bubbles.”
Tip: Wrap small pieces of hair around each elastic for a polished finish.
Cost: Free–$5.
Pros: Trendy, quick, perfect for all lengths.
Cons: Needs frequent adjustments.
11. Low Braided Bun
The low braided bun is sleek sophistication wrapped in a braid. It’s winter-party approved.
Steps:
- Braid your hair loosely and twist it into a bun at the nape of your neck.
- Secure with pins.
Cost: Free.
Pros: Elegant, long-lasting.
Cons: Can flatten curls.
12. Milkmaid Braid
This style screams Scandinavian winter charm.
Steps:
- Create two braids.
- Cross them over the top of your head.
- Secure with pins.
Tip: Add pearl pins for festive sparkle.
Cost: $5–$10.
Pros: Romantic, versatile.
Cons: Can be tricky to pin evenly.
13. French Rope Braid
It’s a hybrid between a French and a twist braid, perfect for winter weddings.
Steps:
- Section hair at the top.
- Twist and add new hair each turn.
- Secure at the end.
Cost: Free.
Pros: Polished look.
Cons: May slip on fine hair.
14. Pigtail Braids
Yes, adults can totally rock pigtail braids — especially in cozy winterwear.
Steps:
- Split hair into two equal sections.
- Braid both and secure.
Tip: Curl ends slightly for softness.
Cost: Free.
Pros: Youthful, fun.
Cons: Can look casual for formal events.
15. Accent Braid
When you want just a touch of detail, try a small accent braid among loose hair.
Steps:
- Pick a small section and braid it.
- Pin it behind your ear or mix it with curls.
Cost: Free.
Pros: Minimal and trendy.
Cons: Doesn’t stay long if hair is slippery.
16. Boho Braids
Loose, romantic, and free-spirited — boho braids are made for messy sweaters and hot cocoa days.
Steps:
- Curl your hair first.
- Add small random braids.
- Loosen them for texture.
Cost: Free–$10 (for curling tools).
Pros: Relaxed, feminine.
Cons: Can frizz easily in humidity.
17. Lace Braid
The lace braid adds subtle detail along your hairline.
Steps:
- Take a small front section.
- Braid by adding strands only from the top.
Cost: Free.
Pros: Elegant and subtle.
Cons: Requires practice to master.
18. Four-Strand Braid
This one’s for when you’re feeling a little extra.
Steps:
- Divide hair into four parts.
- Cross outer sections alternately over two inner ones.
Tip: Looks best with highlighted hair.
Cost: Free.
Pros: Unique and eye-catching.
Cons: Time-consuming.
19. Infinity Braid
As intricate as it sounds, the infinity braid gives goddess energy.
Steps:
- Start with a small ponytail.
- Wrap a thin section around the others in a figure-eight motion.
Cost: Free–$10.
Pros: Elegant and photogenic.
Cons: Takes patience to perfect.
Winter Hair Care Tips
- Always use a silk pillowcase — it prevents static and breakage.
- Deep-condition once a week.
- Avoid tight braids every day to prevent tension alopecia.
FAQs
1. Which braid is best for dry winter hair?
The Dutch braid or box braids — they protect your ends and reduce exposure to cold air.
2. How do I keep my braids from frizzing?
Use anti-frizz serum or light oil after styling.
3. Can I sleep with my braid?
Yes! Loose braids prevent tangling and help retain moisture overnight.
4. How often should I wash braided hair?
Every 7–10 days, depending on your scalp type.
5. What’s the best accessory for winter braids?
Velvet scrunchies, pearl pins, or silk ribbons — they’re gentle and festive.
6. Are braids damaging in winter?
Only if too tight or left unwashed too long. Keep them moisturized!
7. Which braid suits short hair?
Try accent or side braids — they work even with shoulder-length cuts.
Final Thoughts
Winter doesn’t have to mean hiding under beanies every day. With these 19 winter braid ideas, you can protect your hair, stay stylish, and feel effortlessly confident. Whether you go for the simple rope twist or the dramatic crown braid, remember — it’s not about perfection, it’s about personality.