
20 Grey Nail Designs Ideas You’ll Want to Try
Grey nails are like that quiet friend who always surprises you—low-key at first glance, but full of character once you look closer. Grey might not be the loudest color in the nail polish aisle, but it’s one of the most versatile. It sits comfortably between bold blacks and soft nudes, pairing with almost anything in your wardrobe. In fact, according to a 2024 beauty industry report, neutral shades like grey and taupe grew by 27% in fall/winter nail salon requests, proving they’ve gone from underrated to mainstream chic.
In this detailed guide, I’ll share 20 grey nail design ideas, breaking down the looks with tips, costs, pros, cons, and steps so you can either DIY at home or know what to ask for at the salon. I’ll also sprinkle in some anecdotes and hacks I’ve learned through trial, error, and the occasional nail fail (yes, glitter stuck to my sweater once and it was not cute).
1. Classic Matte Grey Nails
Matte grey is a timeless look—simple yet powerful. The velvety finish makes the color feel modern and understated.
Steps:
- File and shape your nails.
- Apply a base coat.
- Paint 2 coats of mid-tone grey polish.
- Seal with a matte top coat.
Tips: Matte looks best on almond or square shapes for clean edges.
Cost: $10–$20 DIY, $25–$40 at a salon.
Pros:
- Sleek and professional.
- Pairs with almost any outfit.
Cons:
- Chips show more easily on matte finishes.
- Requires frequent touch-ups.
2. Grey Ombre Nails
Ombre transitions from light grey to dark for a gradient effect. It’s like wearing a sunset in cool tones.
Steps:
- Apply light grey base.
- Use a sponge to dab darker grey on tips.
- Blend lightly.
- Finish with glossy top coat.
Tips: Add glitter at the transition for sparkle.
Cost: $15–$25 DIY, $40–$60 salon.
Pros:
- Eye-catching and trendy.
- Looks great on longer nails.
Cons:
- Tricky for beginners without tools.
- Can look messy if not blended.
3. Grey and Silver Glitter Nails
Silver glitter over grey adds instant party vibes. Think “cozy sweater meets disco ball.”
Steps:
- Paint nails grey.
- Dab silver glitter polish on top or just tips.
- Seal with glossy top coat.
Tips: Focus glitter on accent nails if you want subtlety.
Cost: $12–$25 DIY, $30–$50 salon.
Pros:
- Festive and fun.
- Easy to DIY.
Cons:
- Glitter polish is hard to remove.
- Can snag on fabric if chunky.
4. Grey Marble Nails
Marble nails mimic stone patterns with white and dark streaks.
Steps:
- Base coat in light grey.
- Use thin brush or toothpick to swirl in white and dark grey.
- Blend softly with acetone-dipped brush.
- Top coat.
Tips: Use a sponge for a softer marbled effect.
Cost: $20 DIY (with tools), $50–$70 salon.
Pros:
- Luxe, sophisticated design.
- Unique on every nail.
Cons:
- Requires skill.
- Time-consuming.
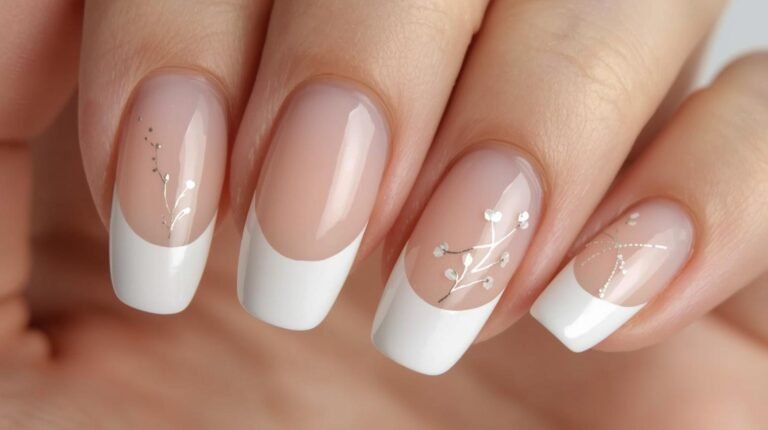
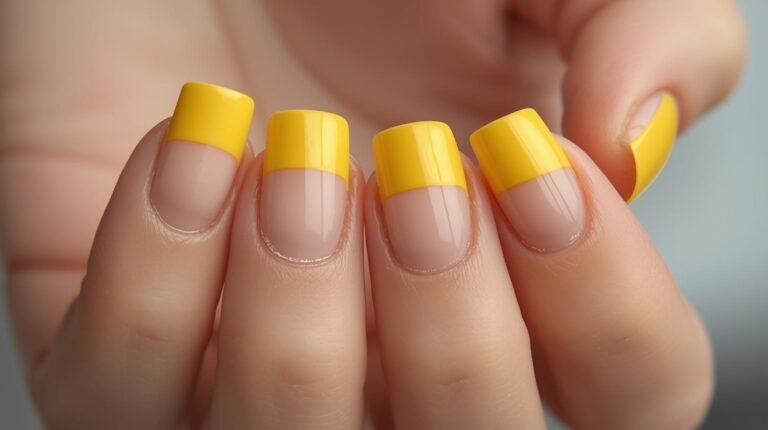
5. Grey French Tips
Classic French manicure but swap white for grey.
Steps:
- Nude base coat.
- Paint grey tips.
- Glossy top coat.
Tips: Try metallic grey for a modern twist.
Cost: $10–$20 DIY, $30–$45 salon.
Pros:
- Minimalist chic.
- Professional and elegant.
Cons:
- Tips chip faster than full color.
- Precision needed.
6. Grey with Black Geometric Lines
A bold, modern look with sharp lines over grey.
Steps:
- Paint nails grey.
- Use striping tape or fine brush for black lines.
- Top coat.
Tips: Keep designs symmetrical for impact.
Cost: $15–$25 DIY, $40–$55 salon.
Pros:
- Artistic and edgy.
- Works on any nail length.
Cons:
- Steady hand required.
- Mistakes are noticeable.
7. Grey Chrome Nails
Grey chrome gives a mirror-like shine that screams futuristic glam.
Steps:
- Base coat.
- Grey gel polish.
- Apply chrome powder with sponge.
- Seal with gel top coat.
Tips: Works best with UV/LED lamp gel polish.
Cost: $30–$40 DIY (starter kit), $60–$80 salon.
Pros:
- Reflective and trendy.
- Long-lasting.
Cons:
- Needs special tools.
- Harder to DIY.
8. Grey and Nude Mix
Alternate nails in grey and nude shades. Effortless contrast.
Steps:
- Paint some nails nude, others grey.
- Add glossy top coat.
Tips: Choose tones close in saturation for balance.
Cost: $10–$15 DIY, $30–$40 salon.
Pros:
- Easy to do.
- Subtle yet stylish.
Cons:
- Can look plain if not accessorized.
9. Grey with Rhinestones
Add rhinestones for sparkle and luxe vibes.
Steps:
- Paint nails grey.
- Apply rhinestones with nail glue or top coat.
- Seal edges with clear polish.
Tips: Place gems only on accent nails for elegance.
Cost: $15–$20 DIY, $40–$70 salon.
Pros:
- Glamorous and unique.
- Great for events.
Cons:
- Stones can fall off.
- Hard to remove.
10. Grey with Matte and Glossy Contrast
Use both matte and glossy finishes for texture play.
Steps:
- Paint nails grey.
- Apply matte top coat.
- Add glossy patterns (like stripes or half-moons).
Tips: Works best on long nails.
Cost: $12–$20 DIY, $40–$55 salon.
Pros:
- Subtle but stylish.
- Looks high-end.
Cons:
- Patterns can smudge.
- Requires precision.
11. Grey with Gold Foil
Warm metallic foil contrasts with cool grey.
Steps:
- Paint nails grey.
- Dab gold foil onto tacky polish.
- Seal with top coat.
Tips: Use foil sparingly for balance.
Cost: $15 DIY, $40–$60 salon.
Pros:
- Luxurious finish.
- Customizable placement.
Cons:
- Foil may peel without proper sealing.
12. Grey Sweater Texture Nails
Textured polish mimics knit sweaters—cozy for fall.
Steps:
- Grey gel polish base.
- Use 3D gel to paint knit patterns.
- Cure under lamp.
Tips: Best on matte finish for sweater vibe.
Cost: $25–$35 DIY, $60–$80 salon.
Pros:
- Unique, seasonal design.
- Instagram-worthy.
Cons:
- Requires skill.
- Not practical for everyday wear.
13. Grey Stiletto Nails
Sharp stiletto shape with glossy grey polish.
Steps:
- Shape nails into stiletto.
- Apply 2 coats of grey.
- Top coat.
Tips: Add metallic tips for drama.
Cost: $20–$30 DIY, $50–$80 salon.
Pros:
- Bold and trendy.
- Perfect for statement looks.
Cons:
- Impractical for daily tasks.
- More prone to breakage.
14. Grey and White Polka Dots
Playful and cute design with dots.
Steps:
- Grey base.
- Use dotting tool for white dots.
- Glossy top coat.
Tips: Vary dot sizes for interest.
Cost: $10–$15 DIY, $30–$40 salon.
Pros:
- Fun and youthful.
- Easy to DIY.
Cons:
- Less formal.
- May look childish if overdone.
15. Grey Gradient with Glitter
Blend greys with added glitter for sparkle.
Steps:
- Sponge light to dark grey gradient.
- Apply glitter polish.
- Top coat.
Tips: Concentrate glitter near tips for ombre sparkle.
Cost: $15–$20 DIY, $40–$60 salon.
Pros:
- Glam yet subtle.
- Versatile for events.
Cons:
- Removal takes time.
16. Grey with Negative Space
Leave parts of nail bare for modern look.
Steps:
- Apply tape for shapes.
- Paint exposed areas grey.
- Peel tape and top coat.
Tips: Works best on medium-length nails.
Cost: $12–$20 DIY, $40–$55 salon.
Pros:
- Trendy and artsy.
- Light on polish use.
Cons:
- Requires steady hand.
- Chips faster at exposed nail.
17. Grey with Pastel Accents
Combine grey with pastel colors like lavender or mint.
Steps:
- Alternate nails grey and pastel.
- Add simple patterns if desired.
Tips: Perfect for spring-to-fall transition.
Cost: $10–$15 DIY, $30–$40 salon.
Pros:
- Soft, feminine look.
- Easy DIY option.
Cons:
- Less “fall” appropriate.
18. Grey Coffin Nails
Coffin shape makes grey look chic and dramatic.
Steps:
- Shape nails coffin-style.
- Apply grey polish.
- Gloss or matte top coat.
Tips: Add accent designs for flair.
Cost: $20–$30 DIY, $50–$70 salon.
Pros:
- Trendy and bold.
- Great for longer nails.
Cons:
- High maintenance.
19. Grey Holographic Nails
Grey with holographic top coat for rainbow shine.
Steps:
- Grey base.
- Apply holo powder or polish.
- Seal with top coat.
Tips: Best under bright light for effect.
Cost: $25 DIY (with holo kit), $60–$80 salon.
Pros:
- Futuristic and unique.
- Fun for events.
Cons:
- Harder to DIY.
- May not suit formal settings.
20. Grey Minimalist Lines
Simple, thin black or white lines over grey base.
Steps:
- Paint nails grey.
- Use striping brush for lines.
- Seal with top coat.
Tips: Stick to one or two lines per nail for clean look.
Cost: $12–$20 DIY, $35–$50 salon.
Pros:
- Sleek and modern.
- Quick to do.
Cons:
- Less dramatic.
FAQs
1. Are grey nails trendy in 2025?
Yes—grey nails remain one of the top fall/winter trends. They’re versatile and chic.
2. Which nail shape works best with grey polish?
Grey looks good on all shapes, but coffin and almond highlight the elegance of the shade.
3. How long does a grey manicure last?
Regular polish lasts 5–7 days, while gel can last 2–3 weeks.
4. Can I mix grey with other colors?
Absolutely—grey pairs well with metallics, pastels, black, nude, and even neon accents.
5. Are grey nails suitable for weddings or formal events?
Yes, especially marble, matte, or designs with foil/rhinestones—they look polished and elegant.